Step 1: Accessing the WordPress Dashboard
To get started, log in to your WordPress website using your administrator credentials. Once logged in, you will be directed to the WordPress Dashboard, which is the control panel for your website.
Step 2: Navigating to the Reading Settings
In the WordPress Dashboard, locate the “Settings” menu on the left-hand side. Hover over it, and a sub-menu will appear. Click on the “Reading” option from the sub-menu. This will take you to the Reading Settings page.
Step 3: Configuring the Number of Posts Displayed
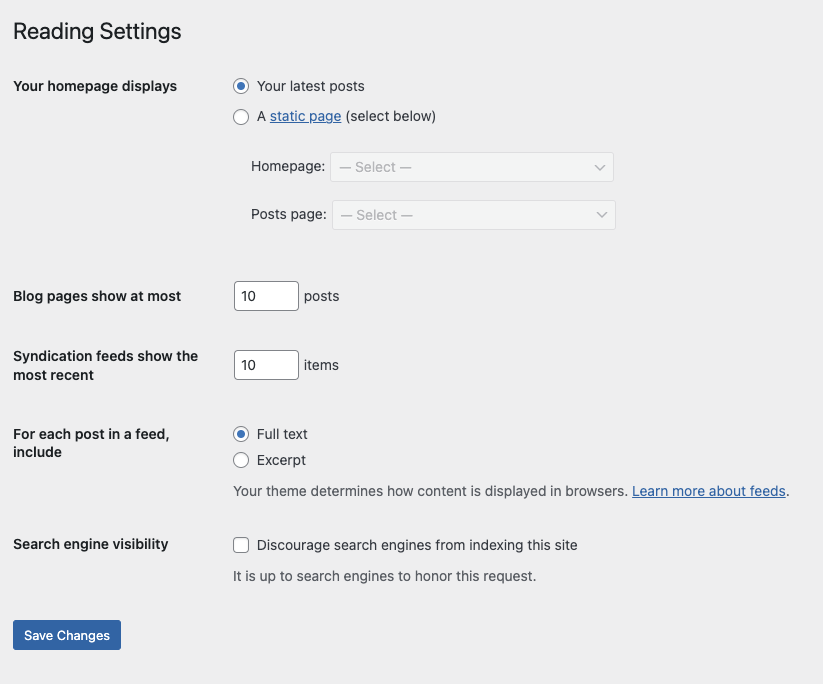
On the Reading Settings page, you will find various options related to how your website displays content. Look for the section titled “Blog pages show at most.”
Here, you can see two text fields: “Syndication feeds show the most recent” and “For each article in a feed, show.” The first field refers to the number of posts displayed in your website’s RSS feed, while the second field determines the number of posts displayed on your website’s blog page or homepage.
Enter the desired number of posts you want to display in the second field. For example, if you want to display 10 posts, enter “10” in the field.

Step 4: Saving Changes
After entering the desired number of posts, scroll down to the bottom of the page and click on the “Save Changes” button. WordPress will now save your settings, and the new number of posts will be applied to your website.
Step 5: Checking the Results
To ensure that the changes have been successfully applied, visit your website’s homepage or blog page. You should now see the updated number of posts displayed according to your preference.
This topic is covered in our Beginners course
Don’t feel stuck by yourself. Jump on the free beginners course and follow setting up your first website via video tutorials.